Most people call me about a garage door opener when the remote stops working. Nine times out of ten the opener itself is fine and the remote is the problem. But I still walk the whole system before I touch a single button, because garage door opener remote programming on a door that is out of balance only hides a bigger failure for another month or two.
I spent a decade installing HVAC and the last twelve years replacing garage door openers in and around Tulsa, more than 200 of them. I keep a drawer of the failed parts, each one labeled with a piece of tape that carries the failure date and the opener that produced it. Nylon gears, cracked trolley arms, photo-eye brackets that got backed into. The drawer tells the story better than any spec sheet.
The order of operations below is the order I actually work in. Balance first, rail second, travel limits third, safety reverse fourth, remotes dead last. Done in that order, two hours on a Saturday buys you a system that behaves for a decade. Done out of order, you spend the two hours on a ladder fighting the door instead of the hardware.
Why you should trust me
Twelve years, 200-plus openers, and a parts drawer I add to every month. When a gear strips at a neighbor's house, I want to know why before I sell them the same unit again, so the tape on that gear says which opener it came out of and how long it lasted. That habit is why I stopped recommending the cheapest units on the shelf, the ones with plastic gears and a "heavy duty" sticker on the box.
I trade parts with two garage door techs in town. When one of them pulls a rail out of a house and sees the same wear pattern I saw three months earlier, that's a pattern, not a fluke. Most of what follows comes from those patterns rather than from a brochure.
I also do this work in Tulsa, which means 100 degree Julys and the occasional ice storm. Heat and power outages are the two conditions that kill openers and remotes around here, and both of them show up in the steps below.
The failures I actually see, in the order they cost you money
The motor is the least important part of the machine. I have pulled 15-year-old motors off doors that were still turning fine, and I have replaced six-month-old heads on doors that were never balanced.
- Stripped gears. Almost always caused by a rail that is out of level or a door that is binding, so the opener is lifting more than the door's weight. The gear takes the abuse.
- Rails that walk. A rail hung from flimsy angle iron will drift, and once the trolley rubs, the chain or belt wears and the noise starts.
- Blinded photo-eyes. A bump from a trash can, a bike, or a lawn mower. In the afternoon, a west-facing lens can be blinded by the sun alone, which is why the door sometimes refuses to close at 6 p.m. and works fine at 9.
- Travel limits that forget themselves. Some openers lose their limits after an outage and then close two inches too far or open too short. The fix is in the manual and takes five minutes.
- Remotes that bake. A remote that lives on a visor in a truck parked outside all day gets cooked. The battery fails first, then the board.
Notice that only one of those five is about the brand. Fix the order of operations and the brand matters a lot less than the sales floor wants you to believe.
What to buy before you start
You have two purchases to think about, and they are on opposite ends of the price scale: a new opener if the old one is done, and replacement remotes if the opener is fine but the clickers are dying. Match the remote to the opener you own, not to the opener you wish you owned. That single mistake accounts for most of the returns I see at the parts counter.
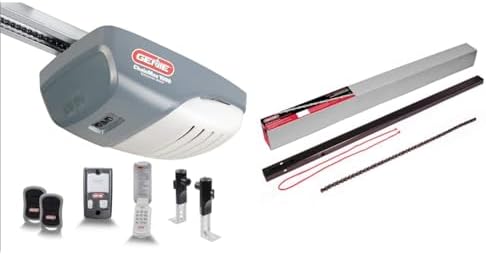
Our pick if you are replacing the whole unit: Genie ChainMax 1000 Garage Door Opener - Durable Chain Drive - Includes Two 3-Button Remotes & EKTC 8ft Chain Drive Garage Door Opener Extension Kit for Genie Tube Style Chain Rails
 Visit on Amazon →
This is a chain drive opener, and it ships as a package with two 3-button remotes plus the EKTC 8ft extension kit for the tube style chain rails. That last part matters more than the headline. If your door opening is 8 feet tall, you need the longer rail, and buying the extension separately is how an affordable opener stops being affordable. Here it comes in the box, along with a second remote so you are not shopping for one the same week.
Chain drive is the right call in exactly two situations. A detached garage with nothing above it, and a budget that is better spent on the door and the track than on the head unit. If you have a bedroom above the garage, understand what you are buying: a chain running through a metal rail bolted to the same framing as your headboard is audible at 6 a.m. My rule has not changed in twelve years. Nobody has ever called me to complain that their belt drive was too quiet.
The rail and the chain on this unit are the parts that decide whether it lasts, not the motor. Hang it straight, keep it lubricated once a year with a proper garage door lube rather than WD-40, and the drive train will outlast the door springs.
The two included remotes are made for this opener. They are not going to pair with your neighbor's Chamberlain, and the ones below are not going to pair with this head unit.
Flaws but not dealbreakers: Chain drive is louder than belt, full stop, and the chain wants a wipe down and a light lube once a year or it starts to sing. Anyone with a bedroom over the garage should budget for belt drive instead.
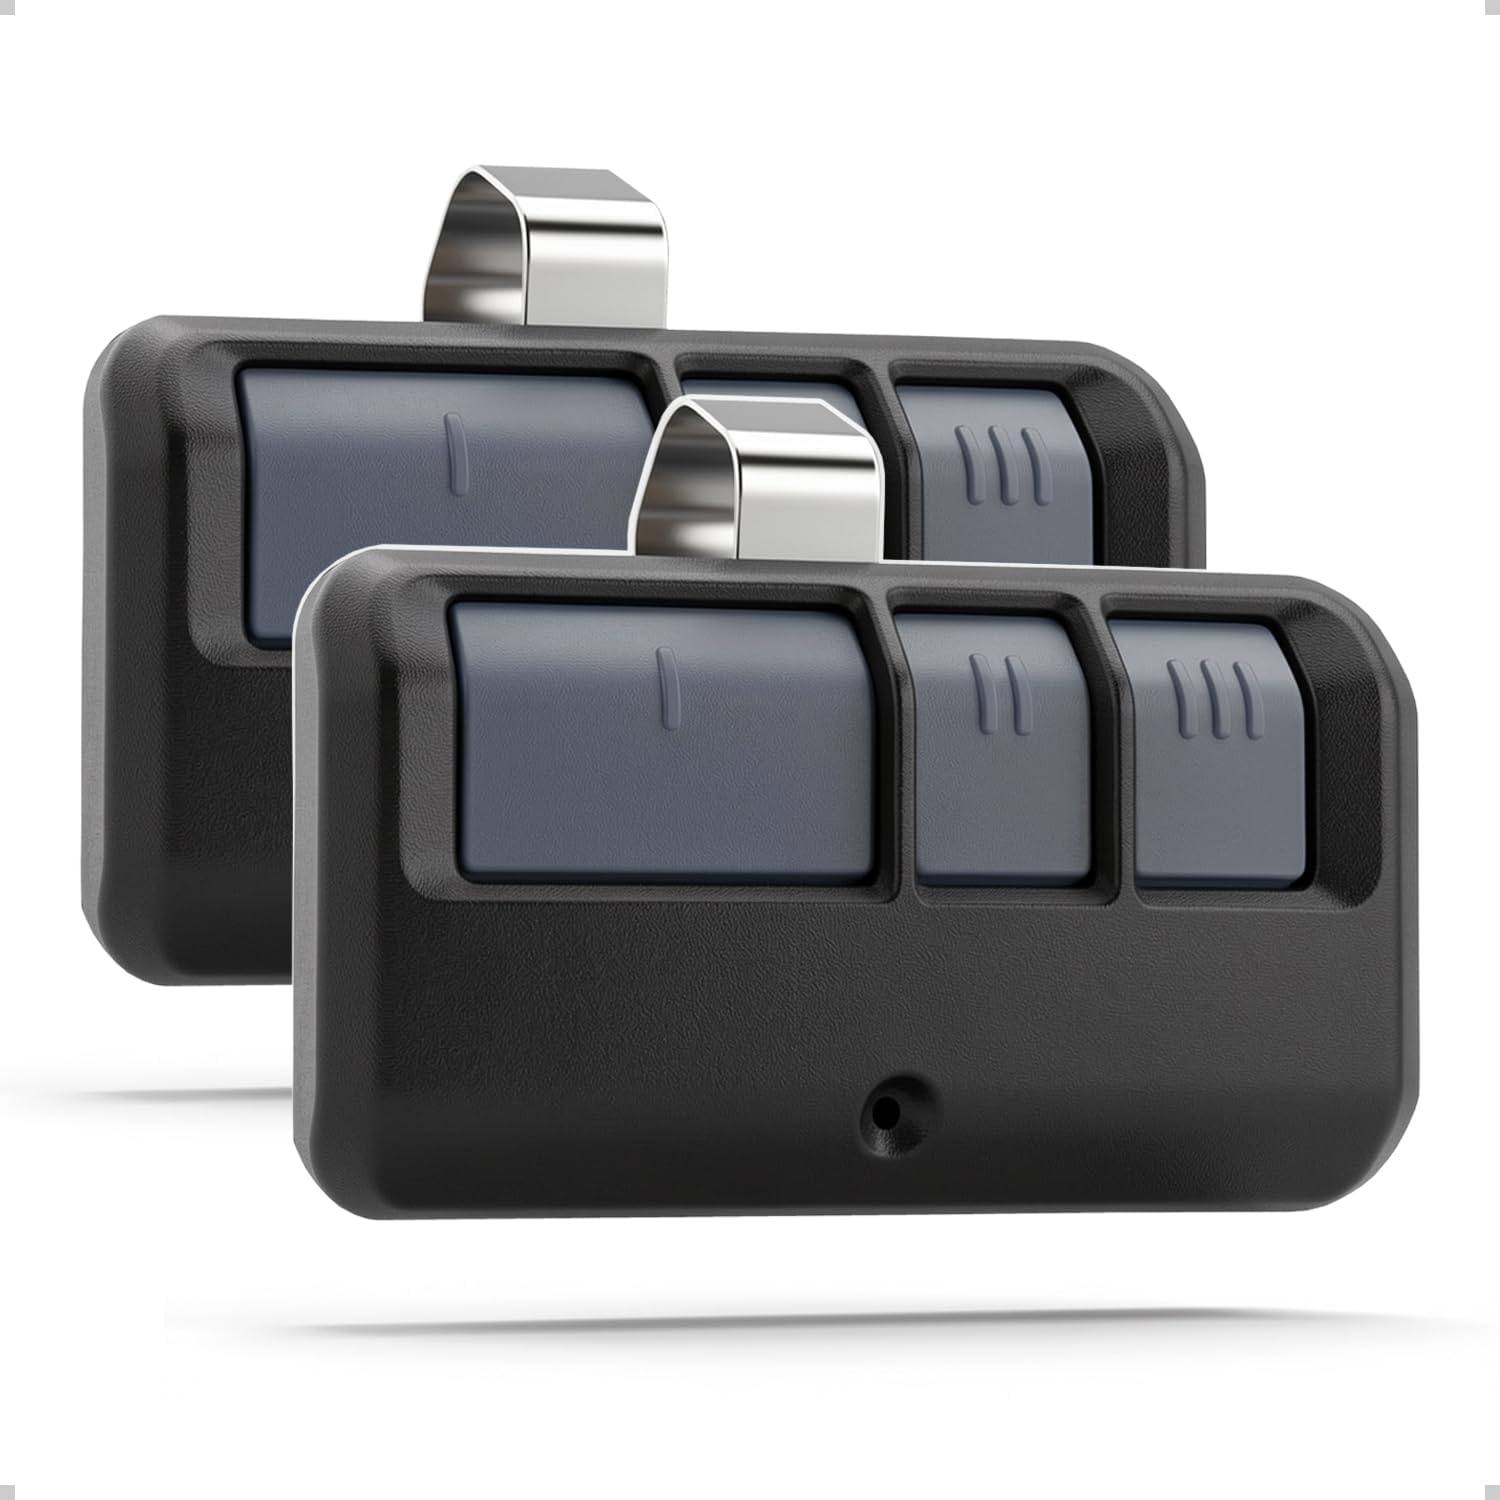
The cheap fix if your remotes are dying: 2-Pack Garage Door Opener Remote for LiftMaster Chamberlain Craftsman (1993-Present) - 3-Button Visor Model, 120ft Long Range, Stainless Steel Clip, 893MAX 371LM 971LM 81LM Compatible, Universal
 Visit on Amazon →
Two visor remotes with stainless steel clips, which is a small detail that matters more than the price. The plastic clips on the cheap clickers snap the first cold morning, and then you are the person holding a remote in your lap at every stoplight.
This one is listed as compatible with LiftMaster, Chamberlain, and Craftsman openers from 1993 to present, including the common 893MAX, 371LM, 971LM, and 81LM styles. Read that list against your old remote before you order. If your existing clicker has a model number stamped on the back, compare it. If you can see the color of the learn button on your opener's head unit, that works too, and it is the fastest way to sort the frequency.
Here is the hard note. This is not a Genie remote. It will not pair with a Genie head unit, and the Genie remotes above will not pair with a LiftMaster. Match the remote family to the opener family and you will never have a problem. The listing does not know what opener is in your garage. You do.
Flaws but not dealbreakers: The 120 foot range is a straight-line number with a fresh battery and nothing in the way. Through a metal door and two walls you will get less, and that is true of every remote on the market. A spare in the kitchen drawer beats a longer antenna.
If you have a LiftMaster or Chamberlain opener from the last thirty years and one dead visor remote, this two-pack is the whole job.
Step one: Balance the door before you buy a thing
Pull the release cord, the red handle, so the door is disconnected from the trolley. Lift the door by hand to about waist height and let go. A balanced door holds there or drifts an inch. A door that slams down, or one that runs back up on its own, is out of balance, and that is a spring problem, not an opener problem.
Do not touch the springs. I have watched a torsion spring take a man's hand apart in a fraction of a second, and I do not care how many videos you have watched. Call a pro, pay the call, and move on. This is the one place in the whole job where I stop being a DIY guy.
What you can do yourself while you are standing there: lubricate the rollers, hinges, and the torsion bar with a garage door lube, tighten the hinge and track bracket bolts, check the vertical tracks for plumb, and look at the rollers for flat spots. Twenty minutes of that work quiets a door noticeably and takes load off the opener.
Step two: The rail and the hang
The rail goes level, centered over the door, and the header bracket goes into solid framing. Not a drywall patch, not a piece of trim, not the end of a 2x4 someone sistered onto a joist ten years ago. If you cannot find framing, add a plywood backer and bolt into that.
The trap I see most often is a rail that is out of level, because the installer eyeballed it. When the rail is not level, the trolley walks to one side, the chain or belt rubs the rail, and every lift grinds a little material off the drive. That is a five-year opener instead of a fifteen-year opener, and no warranty is going to cover it.
Measure your door height and your ceiling height before you order hardware. A 7 foot door works with a standard rail. An 8 foot door needs the extension rail, which is the kit that comes with the Genie above. Hanging matters too: use real angle iron or the supplied hangers into the ceiling joists, and leave a little air between the head unit and the ceiling. Vibration travels through anything you bolt tight against structure.
Step three: Set the travel limits and the force
This is the part people rush, and it is the part that decides whether the door behaves.
- Up limit. Run the door open. It should come to a full stop with the door clear of the opening and not slam into the stop bolt. If it slams, walk the up limit back.
- Down limit. Run it closed. The door should rest on the floor with the bottom seal slightly compressed. It should not reverse when it touches the floor, and it should not stop two inches high either.
- Down force. Set this to the minimum that reliably closes the door. If you have to crank the force up to make the door close, the door is binding, and you have just made the opener do the door's job. That is how gears get stripped.
Some openers forget their limits after a power outage, which is one of my least favorite things about modern units. If yours closes two inches too far after a storm, go back to the manual and reset the limits rather than living with it. A door that closes too far is a door that is fighting its own seal every single day.
Step four: The safety reverse and the photo-eyes
The door must reverse on contact. Test it with a piece of scrap lumber laid flat in the path of the door. It should reverse when it hits. Then test the photo-eyes by blocking the beam with your leg while the door is closing. Same result. Do this once a month, not once a year, and especially after anyone in the house has bumped the brackets.
The photo-eyes sit low on each side of the opening and have to be aligned across the door. When they are out, the door closes four inches and stops, or it refuses to close at all with the light blinking, which is the opener telling you the beam is broken. In Tulsa, a west-facing lens gets blinded by the sun in July, and no amount of button pressing fixes that. Shade the lens or shift the bracket.
Do not let the photo-eye bracket be the thing the trash can hits. If yours gets knocked every week, move it behind the track so it has some protection.
Step five: Program the remotes
Now the part that got you here, and the easy part if the four steps above are done.
- If the opener is used, or you are replacing remotes and think you are near the memory limit, hold the learn button on the head unit until the indicator light blinks or goes out. That clears the old remotes. Check your manual for your brand's exact behavior, because it varies.
- Press and release the learn button on the head unit, or on the wall console if yours has one. The wall console saves you a trip up the ladder, and if you have one, use it.
- Within about 30 seconds, press and hold the button on the remote you want to use. The opener clicks and the light blinks. That is the pair.
- Repeat for the second remote, then test from inside the garage, then the driveway, then the street. You want to know now if the range is thin, not on a rainy night.
For a new opener, the included remotes are usually already paired at the factory, but if one does not respond, run steps two through four.
If you added a smart hub or app module, pair it after the remotes, not before. Some of these apps want a cloud login before they will open the door locally, and that is a problem the day your internet goes out and your car is the emergency exit. Test the app with the Wi-Fi off. If it will not open the door that way, you have a cloud remote, not a smart opener, and you should keep a visor clicker anyway.
When the remote dies in July
Heat kills remotes. A visor in a truck parked in a Tulsa parking lot all day is one of the harshest environments you can put a coin cell and a circuit board in. The battery goes first, then the board, and by the time the board goes you have already replaced two batteries and blamed the opener.
Keep one remote on the visor and one in the drawer. That two-pack above is not about having a backup clicker for guests. It is about the fact that a remote will die in the heat, and you do not want to be locked out of your own garage while you wait for a replacement.
While you are troubleshooting a remote that "just stopped," check the bulb in the opener's own socket. A cheap LED bulb in that socket is the cause of more remote complaints than any receiver failure I have diagnosed. Swap it for an incandescent or a shielded LED and see if the remote comes back from the dead.
What this costs
I am not quoting hardware prices, because they move and a number I type today will be wrong the week you read this. Check current Amazon price on the opener and on the remote two-pack, then do the math against what a pro would charge you for the install in your market.
What drives the number up: belt drive over chain, a longer rail for an 8 foot door, battery backup for storm country, and labor. What drives it down: doing the door balance and the rail work yourself, which is most of the job and all of the part that decides how long the unit lasts. The cheapest component in the entire system is also the one that makes people call me in the first place.
What I would do in your shoes
If the opener runs and the clickers are dead, buy the remotes, match the brand family first, and keep a spare in the drawer. If the opener is finished, buy the unit, then spend a Saturday on the order above: balance, rail, limits, safety reverse, remotes. And if the door will not hold itself up by hand when you release it, stop and call somebody before you bolt anything to the ceiling.
The hardware is the easy part. The order is what makes it last.