Programming a garage door opener remote is a ten minute job that most people turn into a two hour one. I have replaced more than 200 openers in and around Tulsa over the past 12 years, and the remote is almost never the real problem. The door is out of balance, the photo-eye is blinded by the four o'clock sun, or the travel limits drifted the last time the power blinked during a storm.
The order matters. Check the door, then the safety reverse, then the remote, then the app. Skip the first two and you will spend an afternoon pressing buttons on a ladder while the actual fault sits three feet away.
This guide covers the hardware I keep coming back to for this job and the sequence I use on install day, whether you are programming a replacement remote or setting up a brand new opener.
Why you should trust me
I am a handyman and a former HVAC installer, and I have been up and down more ladders than I can count. Over 12 years I have replaced more than 200 garage door openers for neighbors and clients around Tulsa, which means I have seen every failure mode there is: gears stripped by a misaligned rail, photo-eyes knocked out of alignment by a bicycle, chains that snapped in a cold snap, and belts that outlasted two openers.
I keep a drawer of failed parts labeled with the failure date and the opener that produced them. That drawer is why I do not sell on specs. I sell on what broke and when.
What has to be true before you touch a remote
You cannot program your way around a mechanical problem. Three checks, five minutes, no tools.
Door balance. Pull the release cord to disconnect the opener, lift the door to about waist height, and let go. A balanced door stays where you put it. If it drops, or if it floats up on its own, the springs or the door hardware are the issue. Stop here. Spring work is lethal and it is not a homeowner job, so call a pro. A door that is out of balance will strip the gears in any opener you bolt to the ceiling, no matter what the box promises.
Safety reverse. With the door open, lay a two by four flat on the floor in the door's path and hit the close button. The door should contact the board and reverse. If it just pushes down and strains, the force setting is too high. That is a safety problem before it is an inconvenience.
Photo-eye. Wave something through the beam while the door is closing. It should reverse. If it fails, look at the alignment first, then look at the sun. A west-facing garage in the late afternoon is the classic false trip, and no amount of programming fixes a sun-blinded eye.
If all three pass, the opener is not the villain and you can move on to the remote.
The hardware this guide is built around
Two pieces, and they solve two different problems. One is the machine that lifts the door. The other is the thing that actually lives in your car.
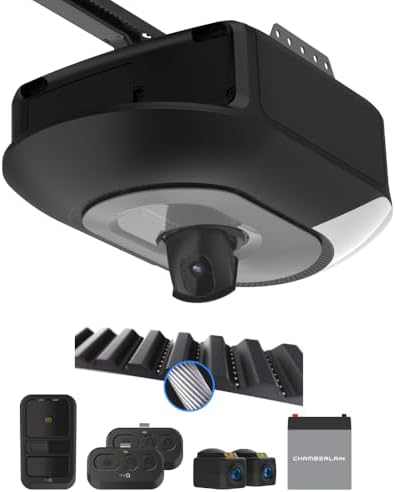
The opener to build around: Chamberlain 1 HP Belt Drive Smart Garage Door Opener with Built-in Camera, Single LED Lighting, Battery Backup, and myQ Connectivity
 Visit on Amazon →
This is the opener I would put in my own house, and I have put a version of it in plenty of others. The 1 HP motor is more than a single residential door needs, but the belt is the part that matters. A belt drive under a bedroom is the difference between your kid sleeping through a 6 a.m. departure and the whole house waking up. Chain is cheaper and it works, and I still sell it to people with a detached garage, but inside the house the belt wins.
The battery backup is the feature I argue for hardest in Oklahoma. When an ice storm takes the grid down for three days, the garage door is how the car gets out. It is also the part that fails first in a hot garage, because the battery cooks all summer. Test it twice a year by unplugging the opener with the door closed and running it. If it strains or stalls, the pack is done.
The built-in camera and the single LED light are conveniences. The myQ connection is the piece most owners touch daily, and I will be honest with you about it: the smart side is 10% of the product and 90% of the support calls I get. It works, and it works far better when the garage has decent Wi-Fi coverage.
Flaws but not dealbreakers: the smart module is only as good as your router, and the camera does you no good in a Wi-Fi dead zone. Add a mesh node or an extender out there before you blame the opener.
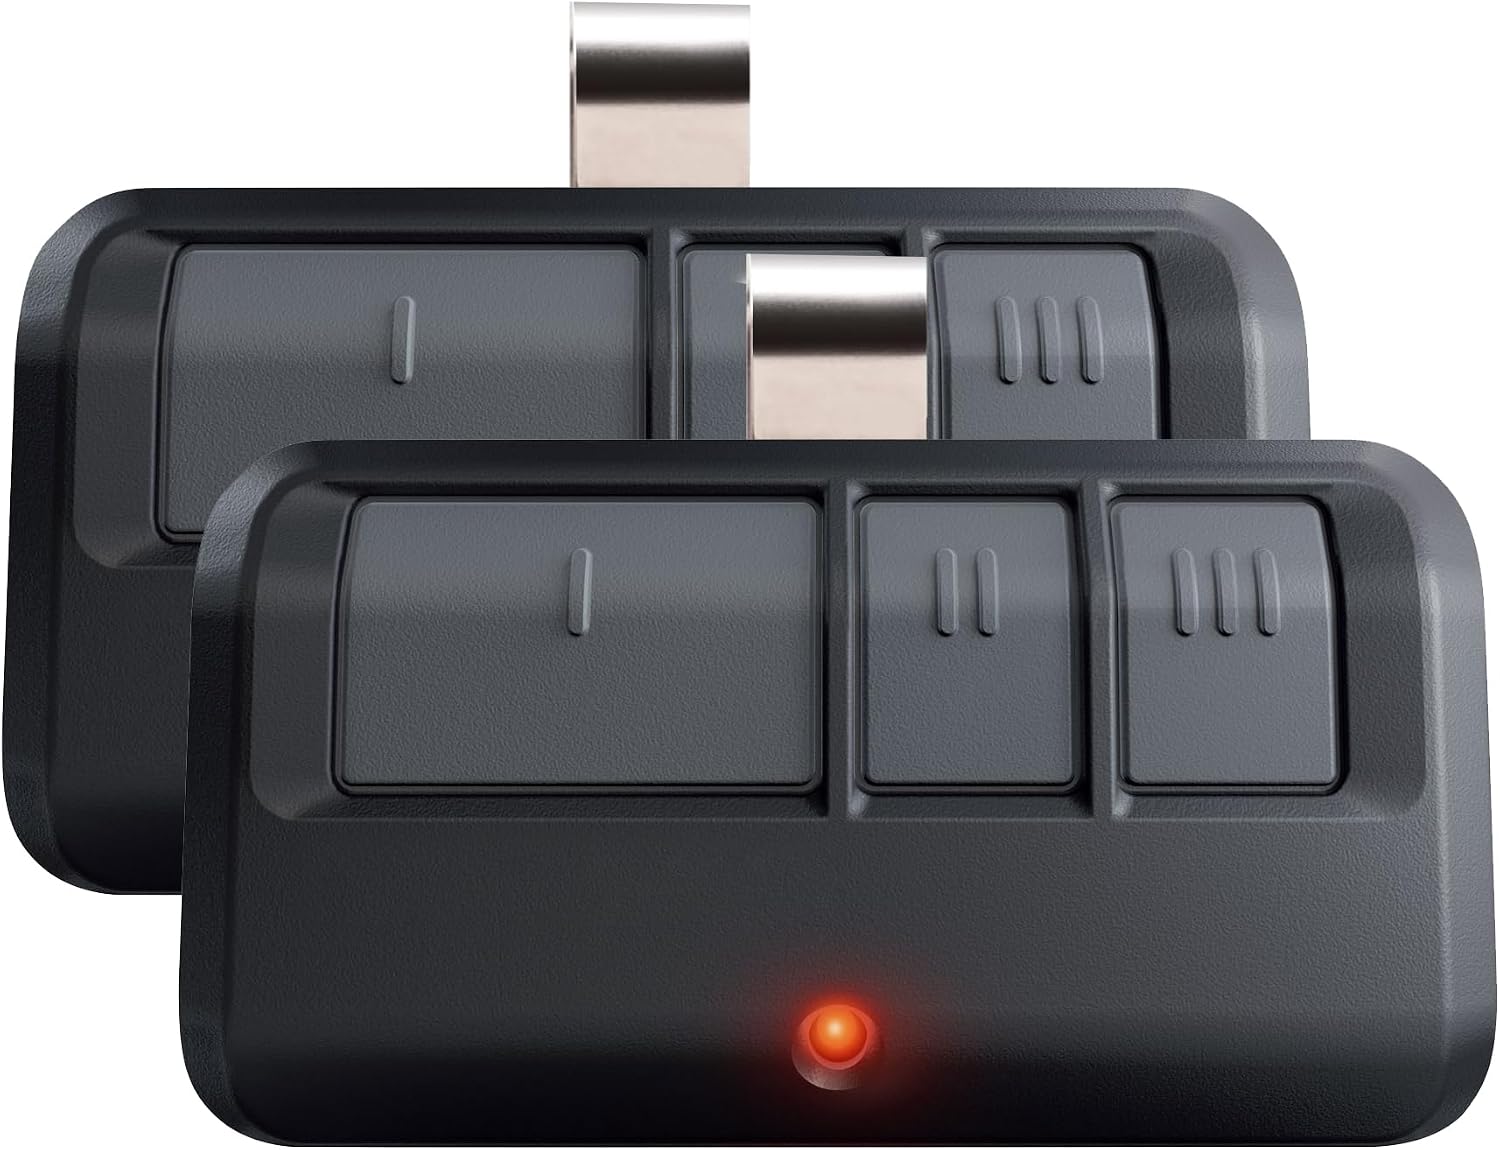
The remotes that live in the car: 2 for LiftMaster Chamberlain Craftsman Universal Garage Door Opener Remote
 Visit on Amazon →
You want two of these, and the two-pack is the whole reason. Remotes die in the visor heat. They get lost, they get dropped in the driveway, they get chewed by a dog. A spare on the shelf turns a bad afternoon into a five minute job.
The listing covers LiftMaster, Chamberlain, and Craftsman openers, which is the trio that owns this market and, more importantly, the trio you can still buy parts for a decade from now. Before you order, climb the ladder and look at the learn button on the motor head. Its color tells you which generation of opener you are dealing with, and that is the one detail worth confirming against the compatibility list.
Flaws but not dealbreakers: universal does not mean every opener ever built. If you have an oddball frequency or a brand that is not on the list, this is not your remote. Check before you buy, not after.
Programming the remote, step by step
This is the sequence for a LiftMaster, Chamberlain, or Craftsman opener with a learn button on the motor head. Plan on five minutes per remote.
Step one: fresh battery. A weak battery is the number one cause of "my remote is dead" calls I get. Put a new one in before you touch the ladder.
Step two: clear the memory if the opener is crowded. If this opener has been programmed to a dozen remotes over the years, old codes can crowd the memory. Most openers clear every remote if you press and hold the learn button for about six seconds. Do this once, then reprogram the ones you actually use.
Step three: find the learn button. It is on the motor head, near where the antenna wire hangs down, and it is colored. Press and release it once. The opener's light comes on or you hear a click, which means it is listening. You have roughly 30 seconds.
Step four: press and hold the remote button. Within that window, hold the button on the new remote for two to three seconds, then release. The opener light blinks or the door cycles, and that is your confirmation.
Step five: repeat for the second remote. Each remote needs its own learn press. Do not try to squeeze both into one window, or you will end up with one working remote and one mystery.
Step six: test it the way you actually use it. Test from the end of the driveway, not from the garage floor. Then test with the engine running and the headlights on. If it works from the driveway but not from inside the car, that is interference, not a programming failure.
One diagnostic that saves people an hour: if the wall button opens the door but the remote does not, the problem is the remote or the programming. If the wall button fails too, stop programming and go back to the balance and photo-eye checks.
Setting the travel limits and the safety reverse
Do this only after the door is balanced. Otherwise you are tuning an opener to fight a door that is heavier on one side.
Open limit. Use the up and down buttons on the motor head to bring the door to the open position. Set the open limit so the door clears the header by about an inch without slamming into it. A door that jerks hard at the top is a door that is going to break a gear eventually.
Close limit. Set it so the door meets the floor and the bottom seal compresses slightly. If the panels bow outward, you went too far.
Safety reverse. With the limits set, lay the two by four flat in the path and close the door. It should touch the board and reverse. If it does not, back the force setting down and try again.
Photo-eye. Re-run the beam test. If it passes in the morning and fails at 4 p.m., the sun is your problem, and a small shield or a repositioned bracket fixes it.
Here is the caveat that matters most to me: some openers forget their travel limits every time the power blinks. If yours is one of them, write the limits on a strip of tape inside the motor head cover. It takes 30 seconds and saves you a call. Battery backup cuts down how often the opener sees an outage, but it does not eliminate outages.
Pairing the app without making it a cloud problem
Download the app, create the account, and have your Wi-Fi password in hand before you start. Pair with the door closed and the opener powered up, then name the door something you will recognize at a glance.
If pairing stalls, it is almost always the network, not the opener. Garage Wi-Fi is the weakest signal in the house, so a mesh node or an extender does more for your smart opener than any setting inside the app. Check the password, check the band, and check that the opener is not stuck on a guest network.
Then do the thing I tell every client to do. Keep a physical remote on the visor and a keypad on the outside frame. Smart is a convenience. It should never be the only way into your own garage, especially when the internet is down or the app decides it wants a cloud login to open a door that is 20 feet from your kitchen.
If the remote still will not take
Work the list in order: new battery, correct generation for your learn button, cleared memory, then distance. After that, look for interference. Cheap LED bulbs, a USB charger plugged in near the motor head, and an antenna wire that has been coiled up or stapled to a joist will all shorten your range. That antenna wire should hang straight down and stay clear of metal.
What I left out of this guide
Chain drive openers are fine, and I still recommend them for a detached garage or a tight budget. They are just louder, and this article is about programming, not about which drive to buy.
Commercial openers are a different animal with a different duty cycle, and I do not touch them. Spring replacement is the other thing I will not walk you through. Call a pro. That one is lethal.
I also skipped the no-name openers you see at the bottom of the price range. They are fine until something breaks, and then you wait three weeks for a part that may never come. Chamberlain and LiftMaster own this market because the parts are on the shelf.
What this costs
Both pieces of hardware here carry a current price on Amazon, so check current Amazon price on each before you decide. What you are buying with the opener is a belt instead of a chain, battery backup for storm season, and parts availability for the next decade. What you are buying with the two-pack of remotes is never having to make a special trip because one died in the visor heat.
If you hire the install out, expect to pay in the range of what I charge, which is $150 to $250 depending on the door and the ceiling. The DIY install is genuinely doable for a handy homeowner, but I will say what I always say: 80% of the installs I get called out to fix have the rail wrong, and the rail is what kills the motor.
The bottom line
Check the door, check the safety reverse, then program the remote. That order is the whole trick. A garage door opener remote that will not take is usually telling you something about the door, the photo-eye, or the limits, and it is telling you before something more expensive breaks.
Do the five minute checks, program your remotes while you are on the ladder, and put a spare in the drawer. That is the job, and it is a ten minute job when you do it in the right order.