A smart garage door opener setup is really two separate jobs, and most people do them in the wrong order. They buy the WiFi controller first, spend an hour fighting an app, and never fix the thing that actually fails around here: the visor remote that cooked in a Tulsa summer and stopped talking to the opener.
The order that works is simple. Get a remote that lives on your keys so you are never locked out, then add the phone control on top of it. One is a five-minute job. The other is a thirty-minute job with a couple of traps in it.
This is a controls article, not a motor article. If your opener is grinding, snapping chains, or dropping the door, new remotes will not save it. If your opener runs fine and you just want better access, keep reading.
Why you should trust me
I'm Dale. I've been in and out of garages in the Tulsa area for twelve years, and I've replaced more than 200 openers for neighbors and clients in that time. I keep a drawer of failed parts, each one labeled with the date it died and the opener that produced it. Plastic gears, cracked photo-eye brackets, remotes that spent three summers in a visor.
That drawer is why I care about door balance more than brand names, and why I've reset more WiFi modules than I have motors. Smart features are about 10% of the product and 90% of the support calls I get. So this guide spends as much time on the checks that come before the purchase as it does on the purchase itself.
How I picked what goes in this guide
I'm not going to pretend I ran these two parts through a lab. This is a controls job, and the failure modes are known. So I filtered on the things that actually decide whether a remote or a controller works in your garage:
Compatibility with the opener you already own, not the opener you might buy someday. Whether the part keeps working when your internet hiccups. Whether your existing wall button still works after the install. And whether the company is still around to answer a question in year three.
One thing I did not weigh: app polish. A pretty app that needs a cloud login to open a door you're standing in front of is not a feature. It's a liability.
What to check before you buy anything
Do this first. It takes ten minutes and it saves returns.
Balance the door. Pull the release cord so the opener is disconnected, lift the door halfway by hand, and let go. A balanced door stays where you put it. If it slams down or drifts up, stop here. No remote or controller fixes a door that is fighting its springs, and spring work is not a DIY job. Call a pro.
Test the safety reverse. With the opener reconnected, put a piece of 2x4 flat in the door's path and run the door down. It should reverse. If it just sits on the wood, fix that before you add anything else.
Check the photo-eyes. Wave a hand through the beam. If the door doesn't react, or reacts only sometimes, the lenses need cleaning or alignment. You will bump them during this job, so know what good looks like first.
Confirm the wall button works. Everything below assumes the wall control still opens and closes the door.
Look at your WiFi band. Garage controllers almost universally want a 2.4 GHz network. If your router publishes one combined network name, plan on splitting it or digging into the router settings before setup night.
Find the learn button. It's on the opener head, usually behind the light lens. Note the color. That color is the single best clue to which generation of opener you have, and it decides which remote you need.
The two parts for this job
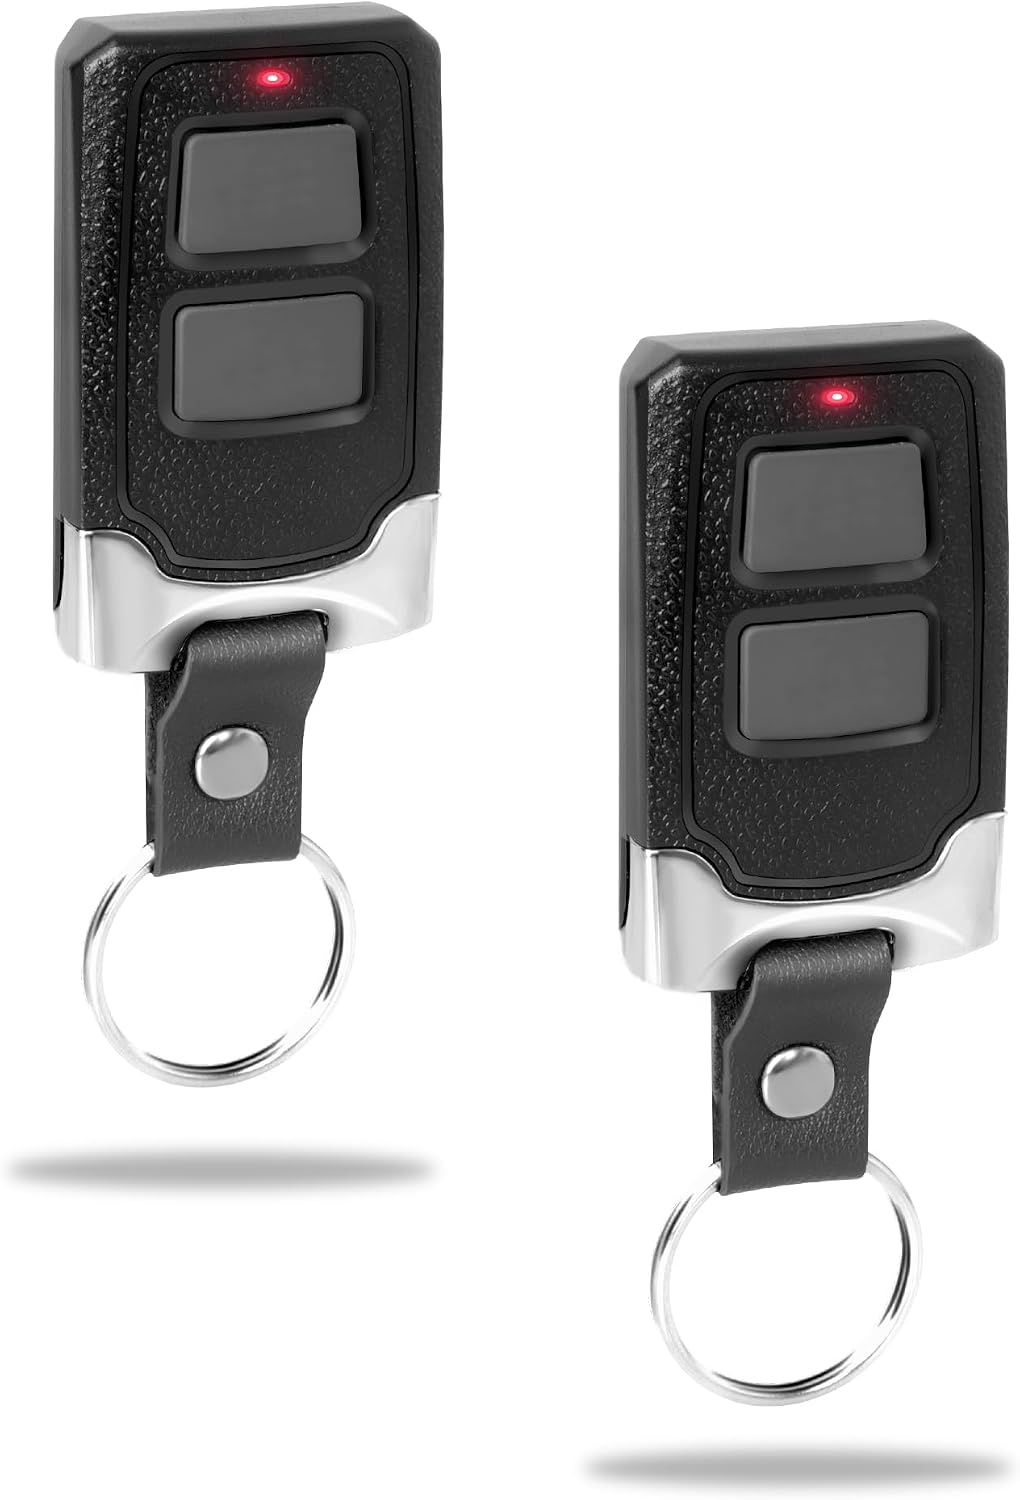
For your keys: 2 for Chamberlain LiftMaster Craftsman Garage Door Opener Remote Keychain
 Visit on Amazon →
This is a two-pack of keychain remotes built for Chamberlain, LiftMaster, and Craftsman openers. The keychain form factor is the whole point. A remote in your pocket lives in the shade at 98 degrees, while a remote clipped to a visor sits in direct sun all afternoon and bakes until the plastic yellows and the button stops registering.
Two of them matters more than people expect. One goes on your keys, the other goes in the kitchen drawer as the spare, so you are not reprogramming a remote at 11 p.m. because someone left theirs at work.
The compatibility note is the part to read carefully. These are made for the Chamberlain family of openers, so if you are running a different brand, verify the match before you order. A remote that isn't on the right frequency or the right code type will look identical and do nothing.
Flaws but not dealbreakers: A keychain fob is bulkier in a pocket than a bare transmitter, and the button can get pressed against keys in a bag. If that bothers you, keep it on a separate ring.
Anyone with a Chamberlain, LiftMaster, or Craftsman opener who has lost a visor remote to heat, or who wants a spare on hand, should start here.
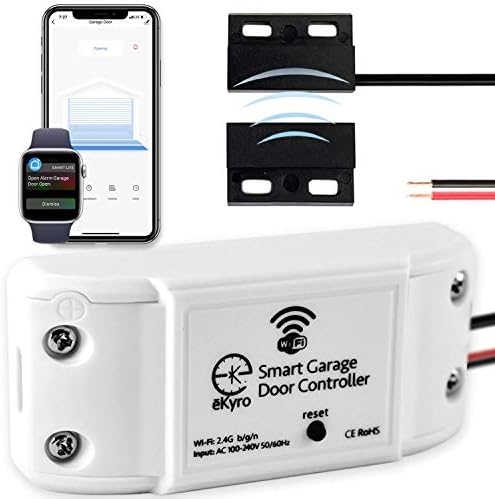
For your phone: eKyro Smart Garage Door Opener - Universal WiFi Remote Controller Compatible with Alexa, Google Home, iPhone, Siri, Android, Door Left Open Alert, Door Security Systems, Updated Model
 Visit on Amazon →
This is the phone half of the job. It's a universal WiFi controller that works with Alexa, Google Home, iPhone, Siri, and Android, and it includes a door-left-open alert. That alert is the feature I'd pay for on its own. In tornado country, a door that got bumped open at noon and is still open at midnight is a real problem, and a notification fixes it.
It mounts at the opener head and wires in alongside your existing wall control, so the wall button keeps working exactly as it did before. That parallel wiring is the reason I recommend this style of controller over anything that replaces your wall button. If the WiFi goes down, the door still works.
The word "universal" is doing a lot of work in that title. It means the controller is designed to cover a wide range of openers, not that it covers every opener ever built. Check the compatibility list against your model before you order, and be honest with yourself about whether your opener's wall control uses a simple two-wire connection or a proprietary link. The simple two-wire setups are the easy ones.
Flaws but not dealbreakers: It needs a 2.4 GHz WiFi network, and the app will want an account. I have never loved cloud logins for a door I'm standing next to, but that is how this category works right now. Also budget ten minutes to read the wiring diagram instead of guessing at it.
Anyone who wants to check the door from the couch, hand a code to a house sitter, or get a nudge when the door is left open will get their money's worth out of this.
Step by step: pairing the keychain remote
This is the easy half. Have the opener's learn button location in mind before you start, because you'll be reaching up there more than once.
Step one: clear the ladder space. Park a step stool under the opener head and take the light lens off if that's what covers the learn button.
Step two: press the learn button. On most Chamberlain-family openers you press and release it once and a small LED near it lights up for a short window, usually around 30 seconds. On some older units you hold it until the LED comes on. Either way, the LED is your timer. When it goes out, the window is closed and you start over.
Step three: press the remote button. While the LED is lit, press and hold the button on the new keychain remote for a couple of seconds. The opener should click and the light may flash, which means it took the code.
Step four: test it. Press the remote once. The door should move. If nothing happens, wait for the LED to go out, then repeat from step two. If it still won't take after three tries, you likely have the wrong remote generation, not a bad remote.
Step five: repeat for the second remote. Same sequence, same learn button. Do it now while you're on the stool instead of next month when the spare is needed.
Step six: label them. Write the date on a piece of tape on the back of the spare. You'll thank yourself in three years when you're trying to remember how old it is.
One caveat worth knowing: openers have a limited number of memory slots, and if the previous owner filled them, new remotes may refuse to take. Holding the learn button down long enough to erase the memory clears every remote at once, including the ones you still use. If you go that route, plan on re-adding every remote in the house in the same session.
Step by step: setting up the smart controller
This half has more places to go wrong, so read the whole sequence before you climb.
Step one: do the pre-checks. Balance, safety reverse, photo-eyes, wall button. If any of those are off, fix them first. The controller is only as good as the opener it's talking to.
Step two: mount the controller at the opener head. Most garages already have an outlet on the ceiling for the opener itself. Keep the unit out of the door's travel path and away from the moving rail.
Step three: wire it in parallel with your wall control. Follow the diagram that comes with the unit. The goal is that both the wall button and the controller can trigger the door independently, so the wall button keeps working when the network doesn't.
Step four: power it up and watch the indicator. Give it a minute to boot before you start poking at the app.
Step five: put your phone on the 2.4 GHz network. Not the 5 GHz band, not a guest network with client isolation turned on. This is the single most common reason a setup stalls.
Step six: create the account and add the door. Name the door something a guest will understand if you ever share access. "House" beats "GD-1."
Step seven: turn on the left-open alert. This is the feature you bought it for. Set the delay to something useful, long enough that it doesn't nag you every time you pull in and out.
Step eight: connect the assistants. Alexa, Google Home, or Siri, whichever you actually use. Skip the ones you don't, because each one is another account link that can break later.
Step nine: test from inside, then from the driveway. Open and close the door from the app while you're standing in the garage, then walk down the driveway and do it again. Then open it and let the left-open alert fire so you know what the notification looks like.
Step ten: leave a non-phone way in. Keep the keychain remote on your keys, or a keypad on the outside frame. An app is a convenience, not an emergency exit.
The mistakes that send people back to the store
Skipping the door balance check. An opener straining against an unbalanced door will eat gears, and no controller prevents that.
Buying a remote for the wrong generation. The learn button color tells you what you have. Match it before you order.
Trying to set up on a 5 GHz network. If the app never finds the device, check this before you check anything else.
Bumping a photo-eye during the install. If the door stops reversing after your wiring work, look at the lenses first. Nine times out of ten that's it.
Forgetting to retest safety reverse. Any time you touch the wiring at the opener head, run the 2x4 test again. It takes thirty seconds.
Assuming travel limits survived. Some openers forget their limits after a power outage and need to be reset. If the door stops short or slams, that's the opener, not your new controller.
Expecting the app to work in a blackout. This controller is not a battery backup. When the power is out, your car is not getting out through that door unless the opener itself has a battery.
What this job doesn't cover
This is not a new-opener guide, and it's not a belt-versus-chain argument. If your opener is mechanically done, stripped gears or a snapped chain, controls won't rescue it.
It also isn't spring advice. If the balance check fails, that's a call to a pro, every time. I've seen what happens when someone treats a torsion spring as a weekend project, and it isn't worth the money you save.
What this all costs
Here's the honest math. You are buying two small parts and spending an afternoon. Check current Amazon price for both, then compare that number to what a new opener plus an install runs. It isn't close.
The remote two-pack is the cheap half and it's the half that keeps you from being locked out. The controller is the more expensive half and it's the half that gives you the alerts. If you can only do one this month, do the remotes first, because a working keychain remote is worth more than a smart feature on a door you can't open.
The free part is the most important part. Balance the door, test the safety reverse, clean the photo-eyes. That ten minutes is what makes both purchases last instead of becoming another entry in somebody's drawer of failed parts.
Do the checks, pair the remotes, then wire in the controller. That's the order. Your door will thank you, and so will the person standing in the driveway at midnight.