Most garage door opener installs fail for reasons that have nothing to do with the motor. I have pulled more than 200 openers out of Tulsa ceilings over twelve years, and the pattern barely changes: a rail assembled with the splice at the wrong end, a door that was never balanced, a belt tensioned by ear, and a photo-eye knocked crooked every time a trash can clips the track. A belt drive garage door opener fixes the noise problem and almost nothing else. The three hours around it decide whether the unit lasts five years or fifteen.
This is the workflow I run on a Saturday morning swap, plus the two parts worth buying new while the ladder is still in the garage.
Why you should trust me
I am Dale. I spent nine years in HVAC before I moved into garage doors full time, and I have replaced or repaired more than 200 openers for neighbors, landlords, and clients around Tulsa. I keep a drawer of failed parts, and every one of them is labeled with the failure date and the opener that produced it. That drawer is the reason I care more about the rail, the belt, and the door balance than the horsepower printed on the box. The motor is the least important part of the machine.
What the job actually takes
Budget three to four hours with a second set of hands, five to six if you are working alone. A helper is not optional in my book. Someone has to hold the rail while you pin the header bracket, and someone has to catch the unit if a ladder shifts.
You need a step ladder tall enough to reach the ceiling comfortably, a socket set, a drill with a 3/16 bit for the lag bolts, a torpedo level, a tape measure, a scrap of 2x4 for the safety reverse test, and a headlamp. Garage ceilings are always darker than they look.
Two prerequisites matter more than the tool list. First, you need a working outlet within reach of the opener head, or you need to run one. Second, and this is the one people skip, the door has to be balanced before the opener goes up. If the door is fighting the motor, you are installing a countdown clock, not an opener.
The gear worth buying before you climb
Most of the install is labor. Two parts are worth ordering ahead so you are not making a hardware store run in the middle of the job.
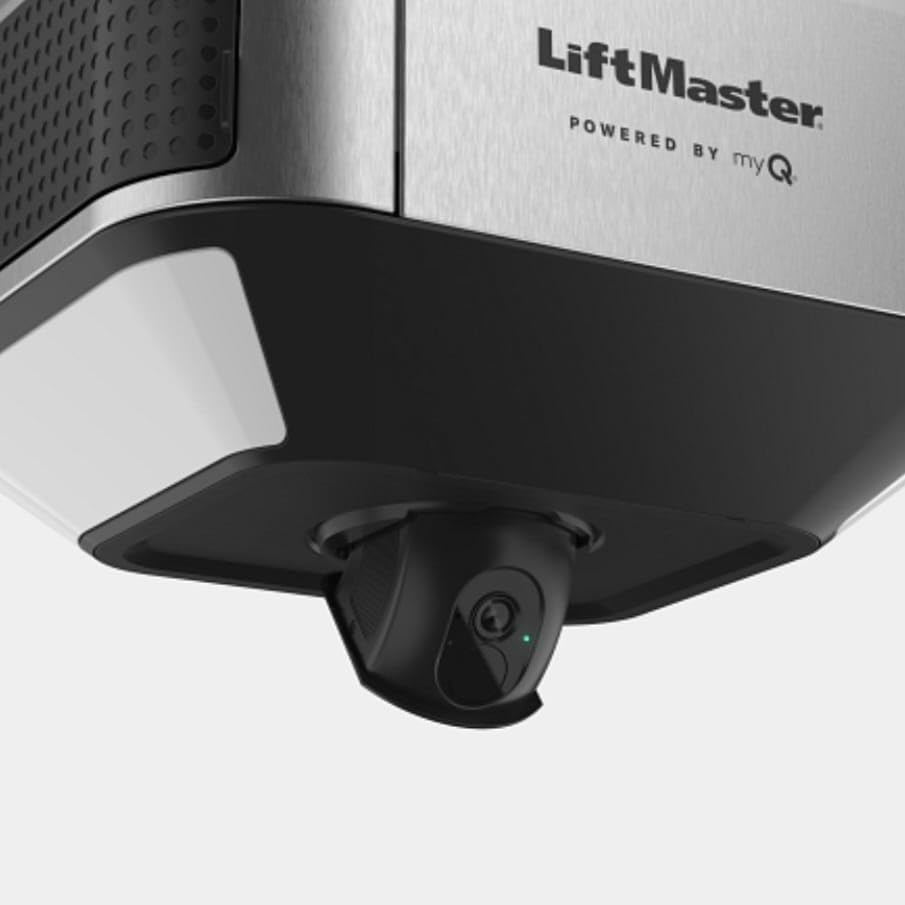
The opener: Liftmaster 6580L Belt Drive Motor Battery Backup with Integrated Security Camera (Replaces 84505, 84504) Plus Two Free Ace Stickers
 Visit on Amazon →
Check current Amazon price. That number is the one to weigh before you decide, because this unit carries the three features I actually argue for: a belt drive, a battery backup, and a camera mounted on the head instead of a separate camera screwed to the wall.
The belt matters if you have a bedroom above the garage. The price gap between a chain and a belt is smaller than it used to be, and it buys your family's sleep. A belt also skips the annual lube a chain wants, and it does not rust.
The battery backup matters in tornado country. When the grid drops, the garage door is how the car gets out, and it is how you get back in when the power is off for two days. I am watching battery packs closely right now, because an Oklahoma garage in August gets hot enough to cook a battery, and that is the failure mode nobody mentions in the showroom.
The camera on the head is the part I have mixed feelings about. It saves you a second power drop at the ceiling, and it lets you look at the door from the couch instead of walking out to check it. It is also the part that generates support calls. Smart features are 10% of the product and 90% of the phone calls in my experience.
This one replaces the older 84505 and 84504 heads, so if you are swapping a dead LiftMaster on a similar rail layout, the job gets shorter. The included stickers are a nice touch for a kid's door or a rental, nothing more.
Flaws but not dealbreakers: The app pairing is the weak link. If your Wi-Fi does not reach the garage, fix that first, because a smart opener with no signal is a dumb opener with extra steps. Plan on a few minutes with the manual.
Homeowners with a bedroom over the garage and a habit of losing power will get the most out of this one.
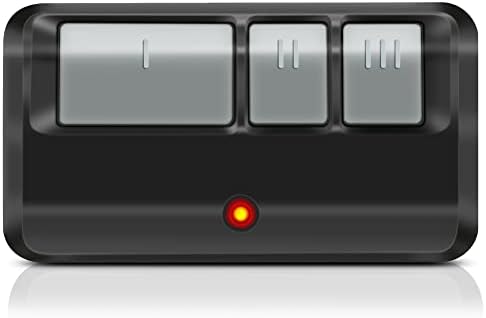
The spare remotes: 2 for LiftMaster Chamberlain Craftsman Garage Door Opener Remote
 Visit on Amazon →
Check current Amazon price. Remotes that die in the visor heat are one of my standing pet peeves, and a two pack means the spare lives in the kitchen drawer instead of the cupholder.
Program them the same day you hang the opener. On most LiftMaster, Chamberlain, and Craftsman heads you press the learn button on the head, then hold the remote button until the opener clicks and the light blinks. Do it while you are already on the ladder with the cover off, not three weeks later when you have to drag the ladder out again.
Keep one remote in the car and one on the hook by the door. In a household with three drivers and one opener, order two packs and label them, because the "which remote is mine" argument is older than I am.
Flaws but not dealbreakers: These are remotes, not smart controllers. They will not tell your phone whether the door is open. That is what the camera on the opener head is for.
Anyone with a LiftMaster, Chamberlain, or Craftsman opener who wants a backup remote without paying dealer counter prices should start here.
Balance the door before you touch the opener
Pull the emergency release cord so the door is disconnected from the opener, lift the door by hand to about waist height, and let go. A balanced door stays where you put it. A door that slides down is fighting you, and a door that climbs on its own is worse.
If it moves, the springs are out of adjustment, and that is where I stop. Garage door springs are wound under enormous tension, and the videos that show a homeowner adjusting them with two winding bars are how people lose fingers. Call a pro for the springs. It is the one part of this job I will not walk anyone through.
While you are down there, look at the rollers and hinges. A dry, grinding roller will make a brand new belt drive sound like a chain drive, and you will blame the opener.
The install, step by step
Step one: Kill the power. Flip the breaker for the garage and tape it. Do not trust the wall switch, because half the openers I replace are wired to a circuit that also feeds a freezer or a hallway light.
Step two: Take the old unit down first. Disconnect the release cord, unbolt the header bracket and the rail hangers, and lower the head with your helper. Keep the old hardware in a coffee can, because you will reuse some of it.
Step three: Set the header bracket. This measurement decides the whole job. The bracket goes above the door's highest travel point, centered on the door, and the rail has to sit level from there back to the opener head. If the rail is out of level, the trolley drags, the travel limits drift, and the opener forgets where the door is after every power blink.
Step four: Assemble the rail on the floor. Do this before you are on a ladder. Follow the manual for the belt path exactly, and do not over-tension the belt. A belt should have a little give. Too tight and you will hear it whine, and the motor works harder than it should.
Step five: Hang the head. Use the angle iron and lag bolts into the ceiling joists, not into drywall and not into the bottom of a shelf. If your joists do not land where you need them, add a plywood backer across two joists. This is where the bad rail installs I see come from.
Step six: Connect the door arm and set the travel limits. Run the opener up and down with the door attached and watch where it stops. Adjust the limits so the door closes fully against the floor without bowing the top panel, and opens without slamming the trolley into the stop.
Step seven: Mount the photo-eyes. Six inches off the floor on both sides, aimed at each other, and out of direct sun if you can manage it. A photo-eye blinded by afternoon sun is one of the most common service calls I get, and the fix is usually a two inch move or a scrap of shade.
Step eight: Test the safety reverse. Lay the scrap 2x4 flat under the door and close it. The door should hit the wood and reverse within a couple of seconds. If it does not, stop and fix the limits or the force setting before anyone uses that door. This test is not optional and it is not a formality.
Pairing the remote and the app
Do the remotes first, then the app. Press the learn button on the head, hold the remote button, wait for the click. Then, and only then, deal with the camera and the phone.
Two things I tell every owner about smart openers. One, get Wi-Fi signal to the garage before you blame the unit. Two, if the app wants a cloud login just to open the door in your own driveway, that is a design choice and you are allowed to be annoyed by it. I am. It is one of the reasons I still keep a visor remote.
After the first power outage, check the travel limits. An opener that forgets where the door is after an outage is a pet peeve of mine, and it usually means the rail is not level or the limits were set with the door disconnected.
What this all costs
The opener is the big line item, and the remotes are cheap insurance. Check current Amazon price on both before you order, because the gap between a bare bones chain drive and a belt drive with a battery is narrower than it was five years ago.
For labor, I charge $150 to $250 for an install, and that covers the bracket, the balance check, the limits, and the safety reverse test. If you do it yourself, that is the money you are saving. Spread over the ten to fifteen years a belt drive should last, it is a rounding error either way.
The thing worth more than the money is the door balance check you do before the box is even open. An opener that lifts a balanced door lasts. An opener that fights an unbalanced door strips its gears, no matter what the box claims about duty cycle.
When to stop and call a pro
Stop for springs. Stop if the ceiling is more than ten feet up, or if the only mounting points are steel beams you cannot drill. Stop if the door itself is falling apart, because a new opener will not fix a door that is sagging off its hinges.
If you have a helper, a level ceiling, and a balanced door, this is a Saturday morning. Hang the belt drive, set the limits, test the reverse, pair the remotes, and leave the app alone until you actually need it. That is the whole job.