Most of the openers I get called out to replace in Tulsa did not die of a bad motor. They died of a rail that was never level, a door that was never balanced, or travel limits that walked out of adjustment after a power flicker. The belt drive garage door opener is the easy part of the job. The order you do the work in is what decides whether you get five years or fifteen.
I'm Dale. I spent years in HVAC before I moved into garage doors full time, and I've swapped or repaired more than 200 openers for neighbors, landlords, and clients around Tulsa County. I keep a drawer of failed parts, each one labeled with the failure date and the opener it came out of, because I got tired of guessing why things break.
This is the install sequence I actually run, in the order I run it, plus the two parts I would buy for a house with a bedroom above the garage.
Why you should trust me
I've been on ladders in Tulsa garages since 2013. That means I've seen what a hundred-degree attic does to a belt, what a cold snap does to a chain, and what a misaligned rail does to a plastic gear set. My repair business runs on the fact that about four out of five DIY installs I get called to inspect have the rail set wrong in some way: not level front to back, not level side to side, or mounted to a ceiling that flexes when the door moves.
I also have a bias I'll state up front. I balance the door before I touch anything else. An opener is only as good as the door it lifts. If the door is fighting the opener, no brand, no horsepower rating, and no app will save it.
How I picked and how I tested
I did not run a lab test for this piece, and I won't pretend I did. What I'm giving you is a service record: the failure modes I see, the parts that survive, and the order of operations that keeps a new opener out of my truck.
My criteria for anything I recommend are boring on purpose. Belt quality, because the belt is what you're paying for on a quiet unit. Rail rigidity, because a flexing rail eats gears and confuses travel limits. Parts availability, because the cheap brands are fine until something breaks and you wait three weeks on a gear kit. And manual clarity, because half the support calls I run are really manual-reading calls.
The $150 to $250 band is the value zone in openers. Below that you tend to find plastic gears dressed up as heavy duty. Above that you're mostly paying for brand polish and app work, which is 10 percent of the product and 90 percent of the support calls. I've reset more Wi-Fi modules than motors.
The two parts worth buying before you start
You need an opener and you need a way to open it from the car. That's the whole shopping list for this job. Everything else, the wall console, the safety sensors, the hardware, should come in the opener box. Confirm that on the listing before you order, because a missing photo-eye bracket is a wasted Saturday.
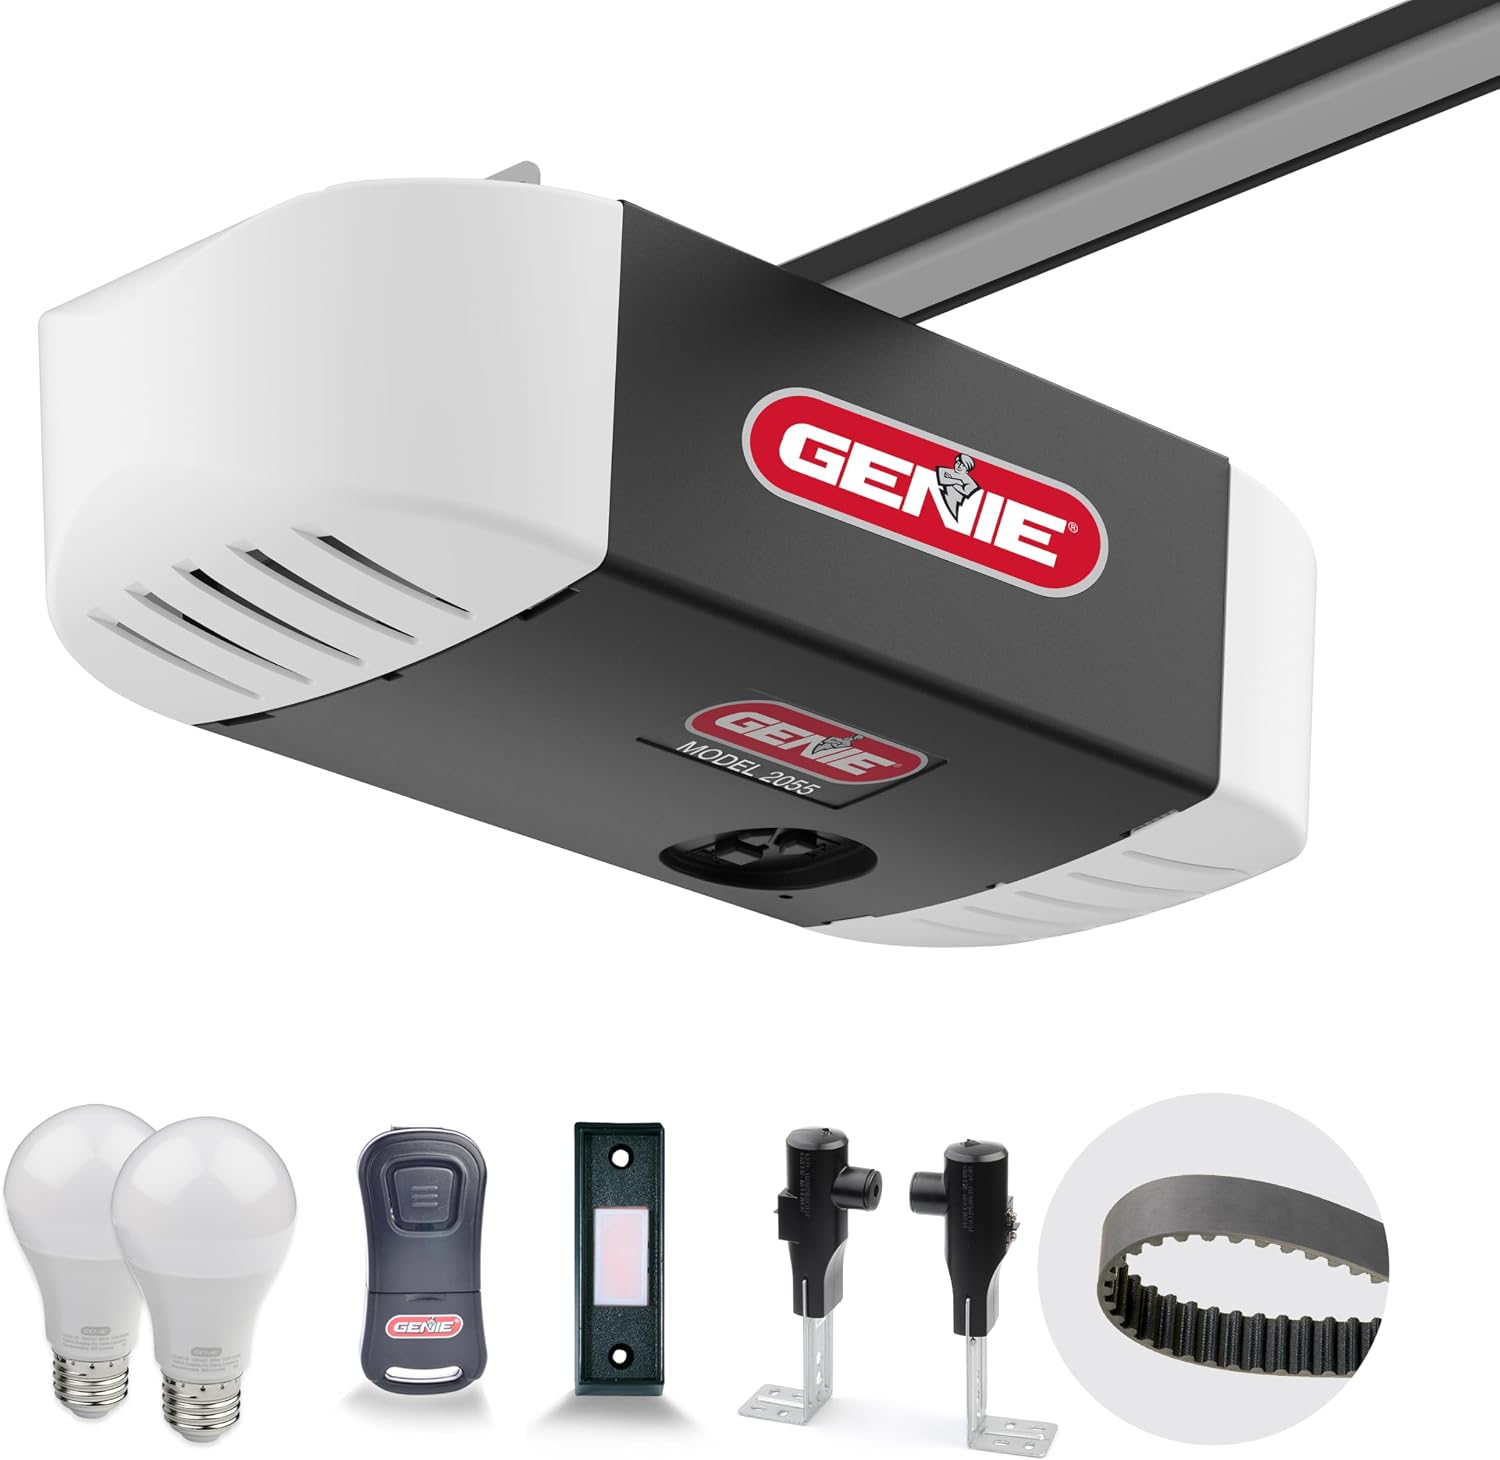
The opener: Genie Stealth 500 Ultra-Quiet Belt Drive Garage Door Opener, Model 2055-LO
 Visit on Amazon →
This is the one I'd hang over my own truck if I had a bedroom above the garage. Belt drive over chain, every time, for that house layout. A chain drive transmits every link's rattle straight into the ceiling joists, and the joists are the floor of the room where your family sleeps. The belt takes that noise out of the equation.
Read the listing for the horsepower rating and the exact contents of the box, because those are the two things I check first on any new unit and the two things that vary. What I can tell you from the trade is what the drive type buys you: a belt runs smoother, needs less lubrication attention than a chain, and on the units I've serviced, belts have outlasted the openers they were bolted to. I've pulled belts off dead openers and put them back into service.
Flaws but not dealbreakers: A belt still needs a balanced door and a level rail. If you skip the two setup steps below, you'll strip the same gears you would have stripped with a chain unit, and you'll blame the belt. Also budget your time honestly: a first-time install is a half day with a helper, not an hour.
Homeowners with living space above or beside the garage, or anyone who works nights and sleeps days, get the most out of this. If your garage is detached and sits 60 feet from the house, the quiet premium buys you less, and that's a fair reason to look at chain instead.
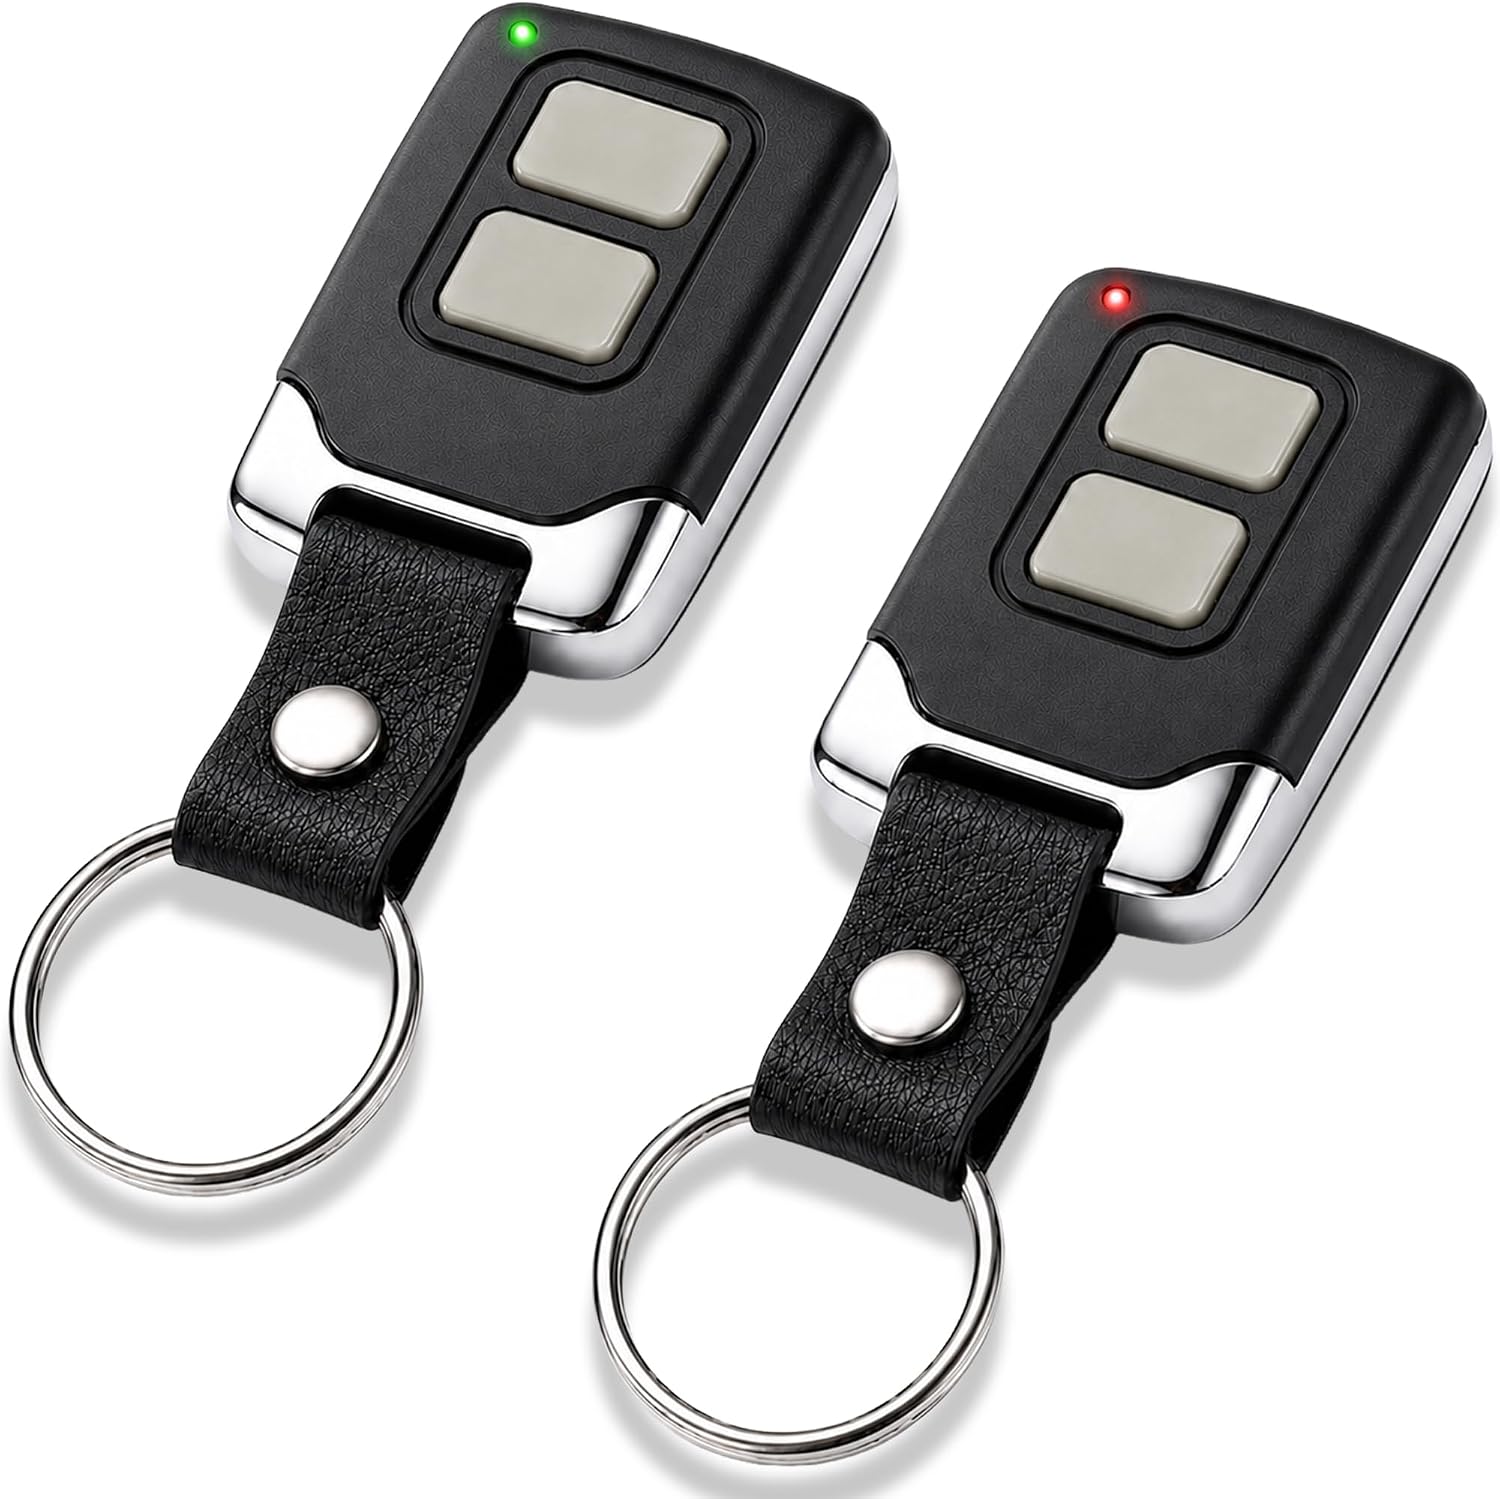
The remote: 2 for LiftMaster Chamberlain Craftsman Garage Door Opener Remote
 Visit on Amazon →
Two remotes, and the second one matters more than people think. Remotes die in the visor heat. I've pulled more dead remotes out of cars in August than I've replaced wall consoles in twelve years, and a visor clip in direct Oklahoma sun is a slow bake.
Buying the pair means you have a spare that lives in a drawer instead of a car, so when the first one goes flat you're not opening the door by hand in the rain. It also means a second driver, a spouse, or a kid with a car gets their own instead of sharing one that migrates between cupholders.
Compatibility is the thing to verify before you order. These are built for LiftMaster, Chamberlain, and Craftsman openers, but those brands have used more than one frequency and more than one learn procedure over the years. Check the listing against your opener's model and the color of the learn button on the back of your existing unit. If it doesn't match, no amount of pressing will pair it.
Flaws but not dealbreakers: These are visor remotes, not a keypad or a phone app. If you want to hand a code to a dog sitter, that's a different purchase. And the pairing procedure is fussy on older units, so read the steps twice before you start jabbing buttons.
Anyone with a LiftMaster, Chamberlain, or Craftsman opener who wants a spare on the shelf should grab the pair.
The actual install workflow
Now the part you came for. This sequence works on any residential belt drive opener. Follow the manual for the model-specific button presses and use my order for the physical work.
Step one: balance the door first. With the door disconnected from any opener, raise it to the halfway point and let go. A balanced door holds there. If it slides down or climbs up on its own, stop. That's a spring problem, and spring work is the one thing I will not walk a homeowner through. Torsion springs are lethal. Call a pro, then come back to this list.
Step two: mark the center line and the header height. Find the door's center, drop a chalk line, and mark the header bracket height the manual specifies above the door's highest travel point. Measure from the actual door, not from the ceiling, because garage ceilings are rarely parallel to the floor.
Step three: fasten the header bracket into structure. Lag it into framing, not drywall and not a trim board. This bracket takes the pull of the entire door. If there's no framing where the manual wants it, add a backer board spanning two studs and fasten into that.
Step four: assemble the rail on the floor. Lay the rail sections on a clean, flat surface and bolt them together there, not in the air. Check that the assembled rail is straight by sighting down it. A rail assembled with a twist will fight you for the life of the opener.
Step five: hang the rail level. Attach the rail to the header bracket, then lift the motor end to the ceiling. Check level front to back and side to side with a torpedo level, and shim or adjust the hangers until it's true. This is the step four out of five DIY installs get wrong, and it's the reason so many openers sound like a coffee grinder.
Step six: mount the motor to structure with real hardware. Use the perforated angle iron in the box or better, and fasten into joists or blocking. Flimsy strapping lets the whole assembly move every time the door runs. Movement is what kills gears and what makes an opener forget where the door is.
Step seven: set the travel limits. Connect the door, then set the up and down limits using the manual's procedure. Set them with the door connected and balanced, never disconnected. Run the door up and down a few times and watch the trolley, not the door, for the stopping point.
Step eight: prove the safety reverse. Put a two-by-four flat on the floor in the door's path and run the door down. The door must reverse on contact. Adjust the force setting only as far as it takes to pass that test. Cranking force up to force a reversal is how people break doors and hurt themselves.
Step nine: align the photo-eye and test it. The sensors go about six inches off the floor, both lenses aimed at each other and both lights solid. Wave a broom handle through the beam with the door closing to confirm it reverses. If your garage faces west, watch how the sensors behave in late afternoon sun. Direct sunlight on the receiving eye is the single most common false trip I get called about.
Step ten: pair the remotes and the wall console. Follow the manual's learn procedure for each remote, one at a time, and test each from inside and outside the garage. Then test the wall console. If you bought a two-pack, pair both now and put the spare somewhere that isn't a car.
Where people get it wrong
The rail is the big one. Level means level in two directions, and it means checked after the door has run ten times, because new hardware settles. Re-check it a week later.
The second is the header bracket into drywall. I've pulled brackets out of drywall with my hand. If the door can pull it, the door will pull it.
The third is travel limits set while the door is disconnected or while the door is out of balance. The opener learns a lie, and then it either slams the door or stops it halfway, and then after the next power outage it forgets everything and you're on a ladder again.
The fourth is the photo-eye in direct sun, and the fifth is the remote left on the visor. Neither is a product failure. Both are installation and habits.
And a note on smart features: if the unit you buy wants a cloud login to open the door in your own garage, decide now whether you're fine with that. I'm not, and I tell clients to check for local control before they buy, not after.
The competition and why it lost
Chain drive openers are still the budget answer, and they're not bad. They're louder, they need more lubrication attention, and for a detached garage where nobody sleeps above the door, they'll do the job for years. For a bedroom above the garage, the price gap has closed enough that I don't see the point.
Screw drive sits in the middle. Fewer parts to wear, but the ones that wear are expensive, and the noise sits between belt and chain.
Jackshaft openers, the ones that mount on the wall beside the torsion bar, are the right answer when you have a cathedral ceiling and no room overhead. Different job, different guide.
On the accessory side, a keypad is the upgrade for households that need a code for guests, and a universal remote is the answer when you have two different brands of opener on the same driveway. Today's list is one opener and one spare remote, because that's what a straightforward single-door install actually needs.
What this all costs
Parts are the small number. You'll check the opener and the remote pair on Amazon, and the two together usually land well under what a pro charges for labor alone.
Labor is the real variable. I charge a couple hundred dollars for a standard install, and I'm not the cheapest in town. That number covers the balancing check, the rail work, the limits, and the safety reverse test. If you're handy and you have a helper for the ceiling work, the DIY route saves that money and costs you a Saturday. If your door needs springs, add a pro call for that before anything else happens, because no opener install proceeds on a door that won't hold itself up.
Run the math over the life of the unit. A belt drive opener that gets installed level, on a balanced door, with the limits set correctly and the photo-eye kept clear of afternoon sun, is the cheapest thing in your garage to own. The same opener hung on a twisted rail with a door fighting it is the most expensive, because you'll pay for it twice.
Balance the door. Level the rail. Set the limits. Test the reverse. That's the job, and the rest is just button pressing.