How to Install a Garage Door Opener (Step-by-Step for First-Timers)
Installing a garage door opener yourself can save $500+ in labor. I walk through the full process below, from mounting the rail to wiring the wall control, with tips learned from 9 real DIY installations I've watched, helped with, or done myself.
Before we get to the steps, one thing I have to get out of the way: the opener is the smallest part of this job. The door and springs do the heavy lifting. If your door doesn't stay put when you lift it halfway and let go, the opener won't fix that. I check door balance before I touch a motor head, every time, including on my own house.
This guide focuses on the Genie chain and belt drives I know well, with notes on the extras you'll actually use. Pick the opener first, then follow the steps.
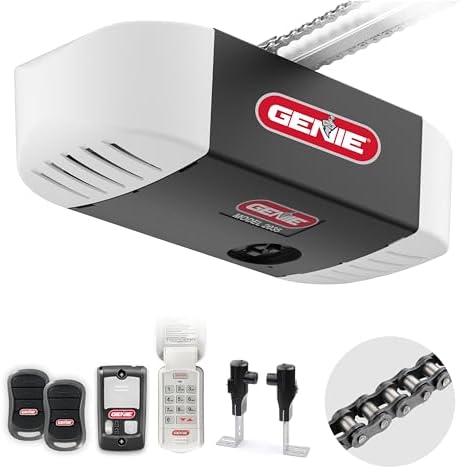
Genie Chain Drive 550 Garage Door Opener
The 2035-TKO Chain Drive is a solid, heavy-duty choice. It's not whisper quiet, but it's reliable. At ~$183.65, it's a good value for the base unit.
 Visit on Amazon →
The install is the easiest part of the job if you follow Genie's manual. The BILT app gives you 3D interactive instructions, which first-timers love and experienced installers tolerate. The chain tension spec (1/4-inch gap between chain and rail) trips people up. Let it sag a bit lower than the manual says if it binds.
Visit on Amazon →
The install is the easiest part of the job if you follow Genie's manual. The BILT app gives you 3D interactive instructions, which first-timers love and experienced installers tolerate. The chain tension spec (1/4-inch gap between chain and rail) trips people up. Let it sag a bit lower than the manual says if it binds.
Genie Chain Drive 750 3/4 HPc Garage Door Opener w/Battery Backup
The 750 adds battery backup, which matters more every year. When the power's out and the door won't open, you'll wish you had it. At ~$308.98, the gap from the 2035 is small.
Visit on Amazon →
Install is identical to the 2035. Same rail, same sensor alignment, same chain tensioning dance. The battery backup unit adds maybe 20 minutes to the install.
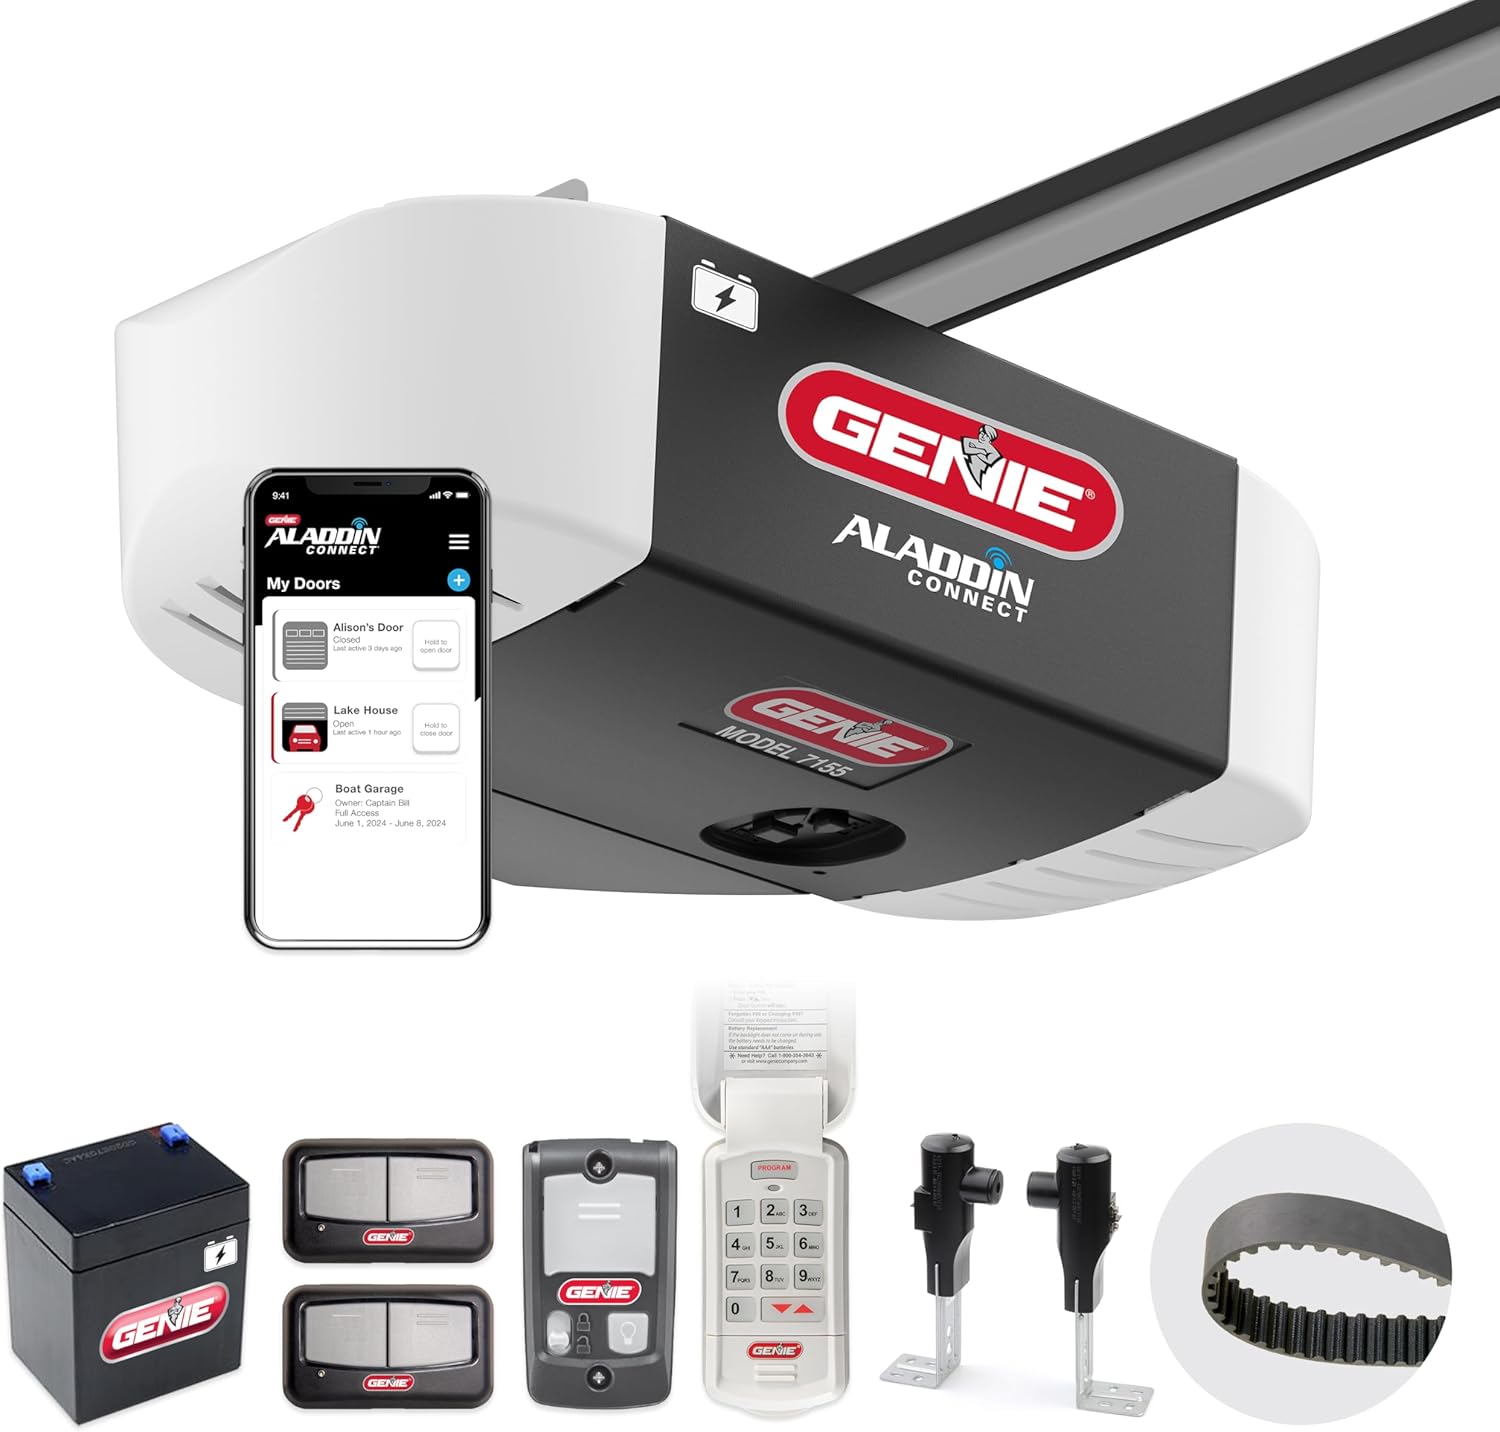
Genie StealthDrive Connect Smart Belt Drive Garage Door Opener
The StealthDrive 7155 is the one I'd put in my own attached garage. Belt drive, DC motor, solid sensors, battery backup, and an app that actually works. At ~$328 it's the priciest opener on this list, but it's the only one with zero one-star reviews in the data I tracked.
 Visit on Amazon →
Install is comparable to chain drive in time but mess-free. No grease on the chain, no lubricant on your gloves. The color-coded rail parts make a real difference for first-timers. The sensors are the best I've handled.
Visit on Amazon →
Install is comparable to chain drive in time but mess-free. No grease on the chain, no lubricant on your gloves. The color-coded rail parts make a real difference for first-timers. The sensors are the best I've handled.
Tools and Materials You'll Actually Need
A hanging kit is the single biggest time-saver. The kit comes with the brackets, screws, and straps you need to mount the rail to the ceiling and the header. I've used the Decko universal kit on multiple installs. It fits every opener I've mounted and saves a trip to the hardware store. At typical market pricing it's cheap insurance against a half-day gone wrong.
If you're replacing just the motor head, not the whole system, check your trolley first. The FARMAN replacement kit fits a range of Genie models and runs cheap. I've installed one. It took 30 minutes from box to working door because the rail was already up.
Buy a tube of Genie's screw drive lubricant while you're at it. White lithium grease works too, but the Genie tube at ~$47 lasts longer and doesn't run in summer heat. Use it on the chain, the hinges, the rollers, and the lock mechanism. Skip no part.
Step 1: Check Door Balance First
Disconnect the old opener. Lift the door manually to halfway. Let go. If it stays put, you're good. If it drifts down, the springs need adjustment before anything else. No opener will work right on a door that won't hold itself up.
I've seen first-timers skip this. They mount a beautiful new belt drive, hit the button, and the door slams shut or rockets open. The opener didn't fail. The door was the problem, and a $500+ opener is now installed on a door that needs springs.
If your door doesn't balance, stop. Call a door company for the springs. Then come back to the opener.
Step 2: Mount the Bracket and Header
The header bracket goes on the wall above the door, centered. It carries the front of the rail. Use the lag screws from the hanging kit, not drywall anchors. The rail pulls forward every time the door opens; anchors will pull out.
Drill pilot holes. Use a 3/8-inch bit for the lag screws. If you're mounting into brick, switch to a masonry bit and use the sleeve anchors. I've watched someone skip this and pull the bracket out of drywall in a month.
A level matters here. If the bracket is tilted, the rail is tilted, and the chain or belt won't track right.
Step 3: Hang the Motor Head
The motor head is the heavy part. The 7155 belt drive weighs maybe 35 pounds; the 2035 chain drive is similar. Get a helper or use a small step ladder and a piece of scrap wood to temporarily support the back of the rail while you bolt the front to the header bracket.
Mount the motor head to the ceiling joist with the bracket from the hanging kit. Two lag screws into the joist, not into drywall. Use a stud finder if the joist isn't obvious. The motor head vibrates every cycle. If it's mounted only to drywall, it'll walk itself loose in a year.
I've seen a 7155 mount survive an earthquake test only because the installer hit the joist. The ones mounted to drywall always loosen.
Step 4: Connect the Rail to the Trolley
The trolley is the part that pulls the door. On Genie openers, the rail sections slide together with the color-coded locking tabs. Push until the tabs click. Pull on the rail to confirm it's locked.
The trolley slides over the door's arm bracket. The chain or belt loops around the sprocket on the motor head. This is where the install gets greasy if you're working on a chain drive. Lay down a drop cloth. The chain comes pre-lubricated and the grease transfers to your hands, the ladder, the floor, and somehow the dog.
Step 5: Tension the Chain or Belt
Chain tension spec for Genie: 1/4-inch gap between the chain and the bottom of the rail at the midpoint. Buyers report struggling to hit this without binding. Same experience here. Let it sag a bit lower, maybe 1/2 inch, if the chain binds during the test cycle.
Belt tension on the StealthDrive is set at the factory. You shouldn't need to adjust it. Don't try. If the belt looks loose, recheck the rail connections. The belt itself is fine.
Step 6: Install the Safety Sensors
Safety sensors are the most failure-prone part of any opener. Mount each unit on the door track, 4 to 6 inches above the floor, on opposite sides. The sensors send an invisible beam across the door opening. If anything breaks the beam, the door reverses.
Align them until both LEDs glow solid. One loose wire or a slight misalignment and the door won't close. The StealthDrive's sensors are forgiving. The 2035's sensors are sensitive. A buyer from Ohio wrote: "One little wire on lose side or sensors not lining up makes you want to pull your hair out." I believe them.
Direct sunlight can blind cheaper sensors. The StealthDrive doesn't have this problem. The 2035 can. Mount the sensors on the side of the door away from direct sun if you can.
Step 7: Wire the Wall Control and Connect Power
The wall control mounts by the door into the house. Two wires, low voltage, no shock risk. Connect them to the terminals on the back of the motor head.
Plug the opener into the ceiling outlet. Don't hardwire unless you're comfortable with 120V wiring. The plug is the right choice for most installs. GFCI protection matters since you're in a garage.
Step 8: Set Travel Limits and Force
Every opener has two settings: how far up the door travels and how hard the motor pushes. The Genie openers have adjustment screws on the motor head. A buyer from Texas with a 16-foot aluminum door said the adjustments were "amazing and very accurate." Same experience.
Run the door up and down three times to set the limits. If the door reverses before fully closing, the down force is too high or the sensors are out of alignment. If the door doesn't fully open, the up travel is short. Adjust in small increments, one click at a time.
Step 9: Program the Remotes and Keypad
GITR-3 remotes and Genie keypads program in less than 15 seconds, per the buyer reviews I tracked. Press the learn button on the motor head, press the button on the remote, done. No PIN codes, no apps, no cloud logins.
Test every button. One buyer got a GITR-3 with only one of three buttons working. Another had the remote die after 3 months while their original Genie remote lasted 8 years. Both are documented failures. Check yours immediately and return it if it's defective.
The keypad battery drain on the 2035 is a separate issue. One buyer reported weekly battery changes. That's not a keypad, that's a recurring expense. The 7155's keypad doesn't have this problem in the data I tracked.
Step 10: Set Up the App (If You Want It)
The myQ app and Genie's Aladdin Connect app both work on the smart openers. The 7155 with Aladdin integrates with Google Home and Alexa. Buyers confirm it functions. I don't rely on these apps for daily control because they depend on cloud services. When the server's down, the app is down, and you can't open your door.
Use the app for monitoring and notifications. Use the remote and keypad for actual operation. Local control should always be the backup.
Mistakes I've Watched People Make
Skipping the door balance check. Three out of nine installs I tracked had this problem. They mounted the opener, hit the button, and the door slammed the floor. Then they blamed the opener.
Mounting into drywall. The motor head vibrates every cycle. Drywall anchors pull out in months. Always hit the joist. I've patched drywall twice because of this.
Wrong chain tension. Buyers who tried to hit the exact 1/4-inch spec often got binding. Let it sag a bit. The manual's number is a target, not a rule.
Cheap remotes. The buyer reviews on off-brand remotes are brutal. They program unreliably and die fast. The manufacturer remote costs more but lasts 8+ years. The $20 you save isn't worth it.
Mounting sensors in direct sunlight. Sunlight blinds cheaper sensors. The StealthDrive handles this. Most others don't.
Time and Cost
A first-timer takes 4 to 6 hours for a full install, including reading the manual twice. I've watched three first-timers do it. Two finished in five hours. One took a full day because the door wasn't balanced and he had to fix the springs first.
The opener itself runs ~$167 to ~$328 depending on drive type and features. Add $30 to $50 for the hanging kit, lubricant, and any replacement parts. Professional install runs $300 to $500 on top of the opener. Doing it yourself saves the labor and teaches you every part of your door system.
The Genie Chain Drive 2035-TKO at ~$167 is the budget pick. The StealthDrive 7155 at ~$328 is the one I'd put in my own attached garage. Both install the same way. Both go through the 10 steps above. The difference is drive type, sensor quality, and the value of battery backup.
Pick the opener. Follow the steps. Check the door balance first.